wordpress Archives - Untame

How To Create Full Screen Background Images In WordPress

Posted by | Tutorial, Video, WordPress | One Comment

WordPress Background Manager

As the internet changes into a more fluid experience, with websites being accessed from tablets, smartphones, laptops, kiosks and even cars, a trend has started to emerge. In an era wherein “Intentional Layout” is dying off, designers must find new ways to provide visual interest. Commonly, this search has led to the use of images. Because, hey, images are interesting by their very nature. In this post, I will show you how to replace your current WordPress background tool with the incredible WordPress Background Manager plugin. Read More

15 Excellent Ways To Learn WordPress

Posted by | WordPress | 4 Comments

WordPress is huge, and it is only getting bigger. Over the past few years more and more developers are turning to WordPress to deliver accessible websites to their clients. This means that at a very basic level it is advisable that no matter your position in the internet world, having a good working knowledge of WordPress is a must.

For Beginners


Welcome to WordPress! This area is dedicated to users that need to know the very basics of how to work within the context of a WordPress site. Need to know how to add your first post? This is the section for you! We assume that right now, you have no need or desire to learn to code your own sites and that is completely cool! A huge amount of the largest blogs and sites in the world are operated by users that have never touched a single line of code. You are in very good company with WordPress!

WP101

A landmark series for WordPress beginners. Not necessarily because it had never been tried before. WP101 is a landmark because it is an incredible resource, provided absolutely free that is of just about the best quality you will find.

WPBeginner

Need a refresher on how to operate your new WordPress site? WPBeginner will help you through the process, from picking out a good hosting company to setting your new site up.


WordPress | Where To Start

Spoilers! The WordPress Codex is pretty great. Not only is it great, but it is the go to place for the latest in WordPress best practices.


WordPress Essential Training (premium)

Lynda.com hosts a variety of training videos and courses. This WordPress essential training video series will take you through just about everything that you will need to begin your publishing journey.

Get Going With WordPress

Plug Alert! Our very own post on what to do once you have installed WordPress.

For Designers


You know the basics. Perhaps you already create awesome sites for your clients using static HTML, CSS & JavaScript and are ready to let your sites go to the next level. WordPress will give you the power to offer clients interactive, editable and feature rich environments. This section is for you, we will cover a few incredible places that you can take your skills to the next level.

WordPress 3: Creating and Editing Custom Themes

Chris Coyier will guide you through a surprisingly easy to understand tutorial on how to create your very own WordPress theme.

wp.tutsplus.com

The home of some of the best darn WordPress tutorials around. Sneak back to the basics and theme development sections to take advantage of the TutsPlus+ resource.

How to be a Rockstar WordPress Designer

A watershed publication in WordPress theme development. What’s better, one of your teachers is the CEO of the entire Envato network of sites… not too shabby!

How to be a Rockstar WordPress Designer 2

Dive deeper into WordPress with this one. Know how to set up a general theme? Nice! Now understand how theme options and plugins work with part 2.

WordPress Codex

This should be on your bookmark bar. Take a load off and go read the codex for an hour or so. I promise you will learn something!

For Developers


You have been there and done that but maybe not yet with WordPress. If you have spent the past few years custom coding your own CMS for your clients or maybe using another CMS like Joomla or Drupal. In this section, we will assume that you have a working knowledge of PHP and will feature some sources from a few WordPress masters!

Digging Into WordPress

Chris Coyier is back with Digging into WordPress. This book basicly defines extensive. Would you like to share in WordPress best practices? There is no better place to start than right here.

WordPress Codex

Are you noticing a theme here? I am not kidding when I assure that you need to make the codex your new best friend! I was totally that guy… “I’ll never need the codex”. Then I wised up. If you are a WordPress developer, the codex is simply the fastest and most searchable way to get the info you need!

ThemeShaper Blog

Get to know WordPress from the theme masters themselves. These guys word at automattic and curate the giant library of free WordPress themes. Better yet, they have dedicated this as a resource to share their knowledge with fellow dev’s.

wp.tutsplus.com

Past the mid-level tutorials, wp.tutsplus.com is really a place where you can dive into complex builds, solving niche problems. All throughout the comments of this site you will find a community of fellow dev’s that are solving problems right along side of you.

WPMU.org

WPMU is a massive source of information, founded by some of the most advanced WordPress plugin developers on the planet. It would serve you very well to make WPMU a daily stop.


There you are, a few of the absolute best ways to learn WordPress no matter your skill level or need. Do you have a favorite that we didn’t cover? Let us know in the comments below!

15 Killer Plugins & Tips for Using WordPress as a CMS

Posted by | Showcase, WordPress | One Comment

To say that WordPress is extensible would be an incredible understatement. There are so many incredible uses for WordPress as a CMS that it would be almost impossible to review them all. However, your friends here at Untame would like to shed some light on a few ways that you can optimize your WordPress install for enhanced content management system functionality.

Pods CMS Framework


“Pods Framework is a content creation kit for WordPress that provides developers and editors with a flexible platform to manage and display custom content.”

The Pods Framework for WordPress is an advanced plugin that allows developers to manage content with a slick user interface. Pods allows you to add context and content to your WordPress site with ease.

Easy WP


Are you put off by the default WordPress dashboard? Have we got a solution for you! Easy WP simplifies with WordPress admin into a simple CMS allowing you or your clients to easily manage posts pages and content. Easy WP also taps into Google analytics for a little extra kick!

XML & Google News Sitemap Feeds


Optimize your WordPress for great Google search results by using XML & Google News Sitemap Feeds. This plugin will help keep your site up to date on Google feeds and results allowing you to pay more attention to creating great new content.

White Label CMS


Do you love WordPress, but need to make it a little more your own? White Label CMS will help you to brand your WordPress site with your company’s logo on the WordPress dashboard as well as the login screen.

Types


Sometimes the adverage post type of “post” just doesn’t cut it. What if you have specific needs? For example, if you run a movie website, it may be a good idea to create a custom post type of “Movies” with its own custom taxonomies of actors, directors… Normally this feat involves a deep dive into PHP code, however Types puts the power of custom post types into your hands!

Posts 2 Posts


Do you need an easy to understand way of making connections between posts, pages and other WordPress elements? You are in luck! Posts 2 Posts will help you create relationships between your content, easily allowing you to create related posts or pages sections with a simple UI.

CustomPress


Do you need to manage more detailed content than just a few blog posts here and there but still love the simplicity of WordPress? Check out CustomPress by WPMU DEV! This plugin offers a powerful UI allowing you to transform your WordPress site into exactly what you need. Use it to manage custom content types, fields and more.

Visual Composer for WordPress


Your pages don’t have to look like a plain ol’ wall of text! Extend your WordPress CMS install with the Visual Composer. With its easy to use drag and drop editor you can add all sorts of content to your site like grids, toggles, sliders, alerts and more. This is a great plugin to extend the usability of your WordPress site!


Point and Stare CMS Functions


Customize WordPress into the CMS of your dreams! Point and Stare adds specific functions that allows users to customize specific areas of WordPress to their liking. Do you have a client that will simply never use specific parts of the WordPress admin such as the “links” area? No problem, remove it!

Restrict Categories


“Restrict Categories is a plugin that allows you to select which categories users can view, add, and edit in the Posts edit screen.” If you are running a blog that has multiple editors or contributors than restrict categories might be just what you are looking for! Use restrict to control which categories your writers have the power to contribute to.

WP-CMS Post Control


“Hides unwanted items within the write/edit page and post admin area for each user role”

If you need a little more control over what your contributors are able to do within the post editor page then WP-CMS Post Control might be exactly what you need! Easily manage user abilities based on specific user roles.

Front-end Editor


Do you love the idea of WordPress and incredible open source awesomeness but wish you had some of the front end controls found in other CMS? If you write better when you can view your work live and in real time, check out the Front-end Editor plugin.

Advanced Custom Fields


Sometimes we need just a little more power than the WordPress editor or even custom fields allows. The Advanced Custom Fields plugin allows users to define an enormous array of field types and implement them with relative ease within post or page templates. In an even cooler turn, the advanced custom fields developers have created a great add-on store that allows for developers to create and sell incredible additions to the plugin.

Permalinks


From the tip jar… When you are using WordPress as a CMS one of the easiest things to overlook is the permalink settings. Permalinks are what you see within your browser address bar, and they also show up in search results. If you want for your new site to look professional, take the time to show the permalink section some love.

For a really nice permalink structure, you may want to create one on your own. To do this, simply click on the “custom structure” radio button and enter the following.

/%category%/%postname%/

(Take two of these and call me in the morning )

Reading Settings


Perhaps the most simple of content managment tips! WordPress was born as an incredible blogging engine, and it still is. However, recently WordPress has come into its own right as a fully functioning content managment system. Yet, one first install, your blog posts will automaticly be displayed on the home page of your site. If you would like to have your posts displayed on another page, simply edit the “Reading Settings” to display them within your desired area.


And there we are! I hope these suggestions get you moving toward your WordPress CMS goals. With these plugins you will be able to extend your WordPress install beyond what is normally capable of and develop a site that goes far beyond the WordPress blogging roots.

15 Popular Tech and Culture Sites That Use WordPress

Posted by | Showcase, WordPress | No Comments

So, you are in the market to launch a brand new website. “We’re going to take over the world, influence the conversation and change online writing forever”, you say? Yet, the thing that you really need is a way to manage your content.

Here at Untame, we use WordPress to create a wide variety of blogs, corporate sites and more. So, it comes naturally to suggest that you might find benefit in developing your next project by choosing the WordPress CMS. Afterall, you would be in great company, since a study done this year found that over Half Of The Top 100 Blogs Now Use WordPress.

All Things D


9to5mac.com


GigaOM


Mashable.com


Ford Social


Mozilla Technologies


Playstation Blogs


Sony


TechCrunch


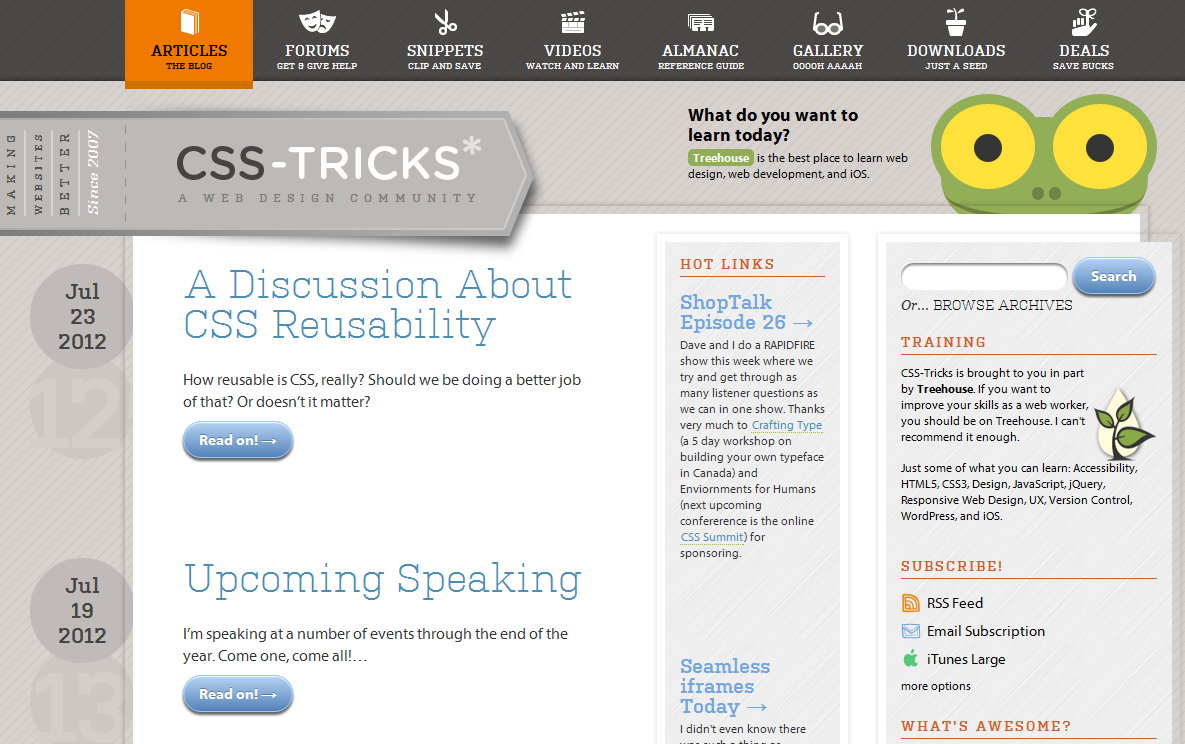
CSS-Tricks


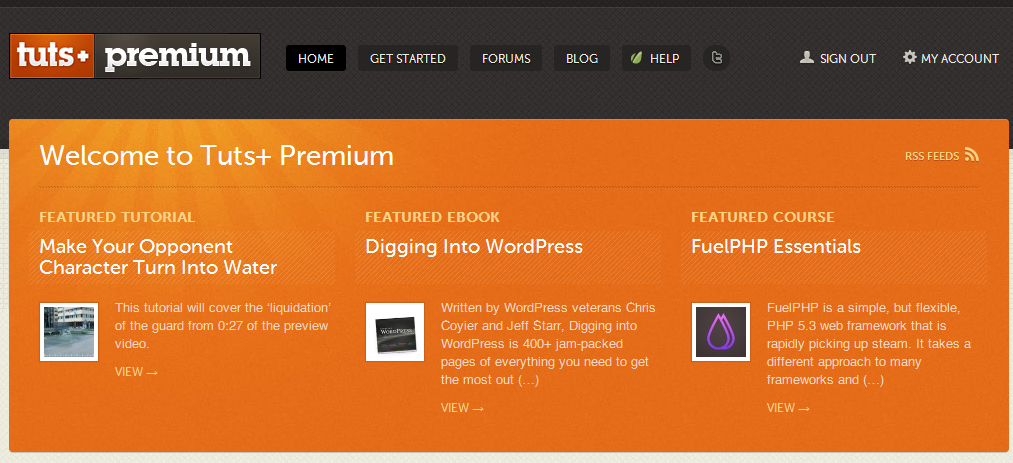
TutsPlus+


NetTutsplus+


PSDTutsplus+


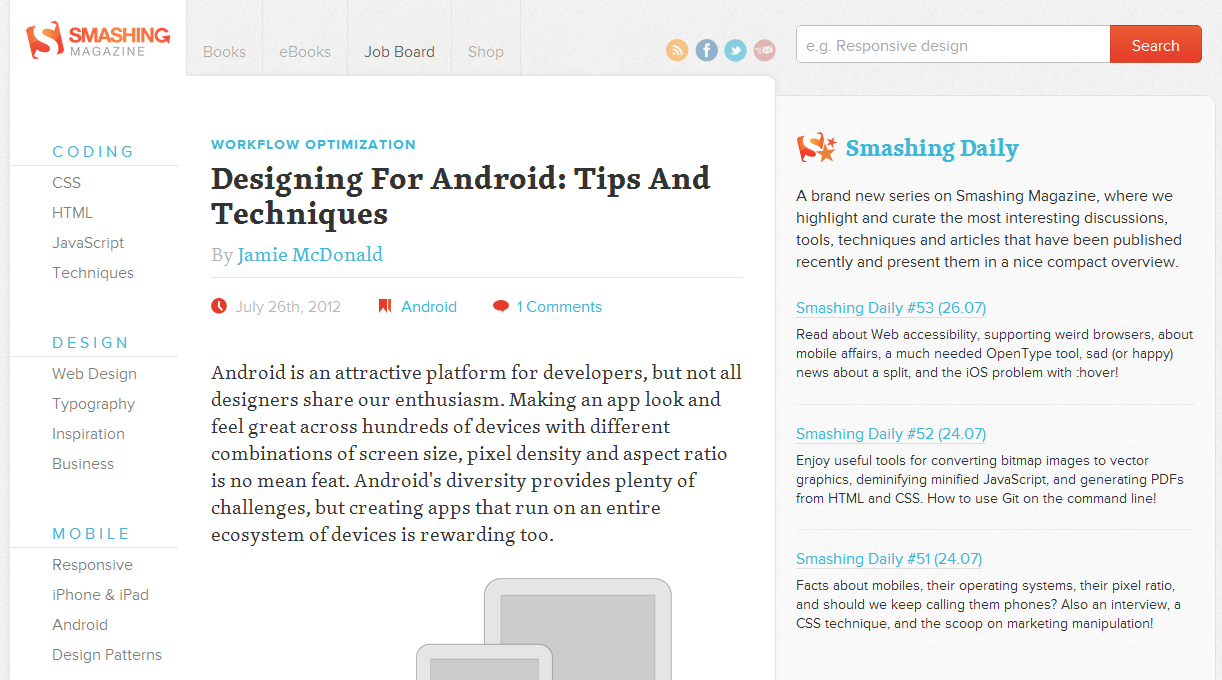
Smashing Magazine


Ebay Ink


Whew! Well, I hate to say I told you so, but hopefully a few of these sites are evidence that not only can WordPress power some of the most popular sites on the internet, but it can fit just about any situation or need. Take the an example of the TutsPlus+ sites from above. They have crafted a multi-million dollar business by exploiting the strengths of WordPress, using a built in feature like multisite to create a manageable network of compelling sites and businesses. So, if after considering what WordPress could provide for your own site or company, consider dropping us a note and let a few of the experts at Untame create an incredible site for you.

Visual Form Builder: Easily Create a Custom Contact Form

Posted by | Tutorial, WordPress | No Comments

By now we have covered several ways in which WordPress Plugins can make your life easier by adding elements to your WordPress site without requiring you to be a web design master. Now, I will be the first to admit to you, forms are frustrating. Web forms can be tricky to build, difficult to validate properly and even harder to make sure that relevant information gets to the site owner when needed. This is why there are so many web form building tools that you can pay for like WooFoo, Gravity Forms and so many more. Today, I present a form building tool that can integrate highly functional forms with a simple drag and drop interface: Visual Form Builder.


Step 1, Getting Started: Install Visual Form Builder

Just like any other WordPress plugin from the repository, VFB is easy to install. Check out the video below


Step 2: Create The Form (Or Forms)

Now that we have Visual Form Builder installed on our site, we can begin creating awesome forms that our users will be able to interact with. To begin, create your first form by giving it a name for example “Contact Form”.

Next, you will notice that VFB has already taken the liberty to create a few important fields for you. Unless you are more than confidant with web forms, it is a good idea to just leave these areas alone. Now we can begin adding fields at our leisure.

To add fields, begin clicking on the fields that you would like to use found in the left hand column of your screen. Even better yet, check out the video below!

http://www.screenr.com/q1F8


Step 3: Place The Form

So, if you watched the video above, you are already ahead of the game and could probably teach this section yourself! However, if you are not the video type then you will find that installing your VFB form is incredibly easy. On the left hand side of the Visual Form Builder settings page, you will find a section titled “Form Output.” Herein, there is a shortcode that we will copy (ctrl+c or command+c). Next, simply navigate to the desired page where your shiny new form will call its home, and paste the shortcode into the editor (note: make sure the editor is in “Visual” mode). Next, click “View Page” to see your contact form rendered in all of its brilliance.


There! Wasn’t that easy? With plugins like Visual Form Builder, adding great functionality to your WordPress site can be easy and, dare I say, a little fun. If you have any questions about installing plugins or setting up your WordPress site let us know. Until next time, adios!

Would you like to see your plugin on Untame? Let us know what your plugin is and why it is awesome and we may post a featured tutorial soon!

How to Set Up Cloudflare with WordPress

Posted by | Tutorial, WordPress | 4 Comments

Cloudflare is a dynamic content delivery network that you can easily get up and running on your domain for free! If you have not already read through part 1 of our series, please take the time to do so before you start on part 2.

Today, we will examine how to easily get started using Cloudflare with WordPress. Initially, it was considered best practice to pair the WP Super Cache plugin with Cloudflare, and if the situation is correct, this could still be the case. However, for small business sites and blogs we really just need to ensure that Cloudflare works properly without much interest for in-depth server or code configurations. Luckily, Cloudflare has created a native WordPress plugin that will fit perfectly within our needs. If you need help understanding how to install a WordPress plugin, go check out our post on installing a WordPress slider plugin for a general overview.


First, navigate into your WordPress dashboard to the plugins overview page. Next select “Add New” found at the top of your view. Search for “Cloudflare” and select install on the correct plugin. (Likely the first plugin on the list but to make sure, the image above leads directly to the plugin on the WordPress repository.)

Configure Cloudflare


Now that you have installed the plugin, find the settings page for the plugin. Likely, the link to the plugin setting page will be located in your WordPress left hand sidebar, within the “Plugins” sub-menu.

While, we are on the subject, I would like to be clear as to how the Cloudflare WordPress plugin will directly benefit your WordPress site.

CloudFlare has developed the plugin for WordPress. By using the CloudFlare WordPress Plugin, you receive:

  1. Correct IP Address information for comments posted to your site
  2. Better protection as spammers from your WordPress blog get reported to CloudFlare
  3. Optimization of your server database (optional)

This plugin helps your published content play nicely with the Cloudflare service and helps you take the steps necessary to optimize your site. To do this you will have access to the Cloudflare Database optimizer and development mode toggle directly within your WordPress Dashboard.

Connect With Cloudflare


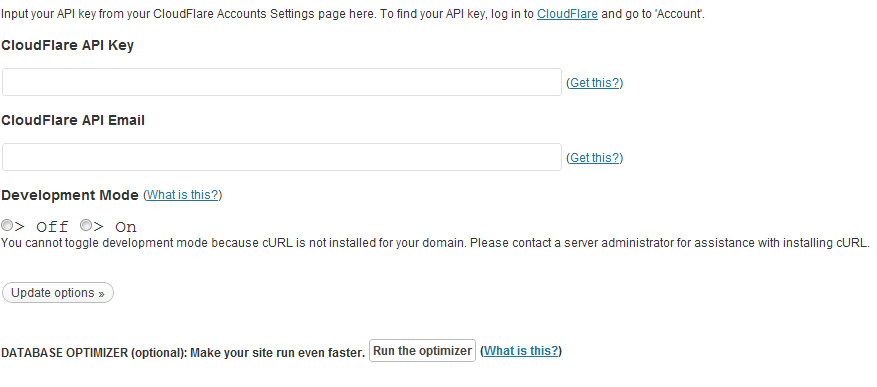
Access your Cloudflare account dashboard by going to the “My Account” tab while signed in to the service. You will need to have two pieces of information to connect the WordPress plugin.

  1. Cloudflare API Key
  2. Cloudflare API Email

Once you have retrieved each piece of info, enter them all into the appropriate fields within the Cloudflare plugin page on WordPress. Once complete, click “update options” and ensure that the connection is successful.


Congratulations! You have successfully integrated the Cloudflare service with your WordPress powered site. Pretty easy right? Next we will take a look at further integration with plugins like WP Super Cache to fully unleash the speed beast.

WordPress Slideshow Tutorial: How To Add a WP Orbit Slider

Posted by | Tutorial, WordPress | 3 Comments

Sometimes it is nice to add some interactivity to your pages. A Home, About or Gallery page can spice up user interaction with the addition of a slideshow, for example. You might assume that cool javascript tricks such as this are out of reach for beginners. However, today I am going to show how you can integrate a great looking slider on your site all with a few simple clicks (and without writing a single line of code).


Step 1: Go Fetch

First, lets take some time to go to the WordPress plugin page for the WP Orbit Slider. Once there, you can read through some of the documentation, faq’s and more. When diving into the use of any plugin, it is a good idea that you familiarize yourself with its area on the WordPress plugin repo as you may find tips that could save a bunch of time.


Step 2: Install

Next, lets get the orbit slider installed on your WordPress blog. We could download the plugin straight from the repo, upload it via FTP and then install it manually. However, thankfully WordPress has a built-in area to take care of that for you.

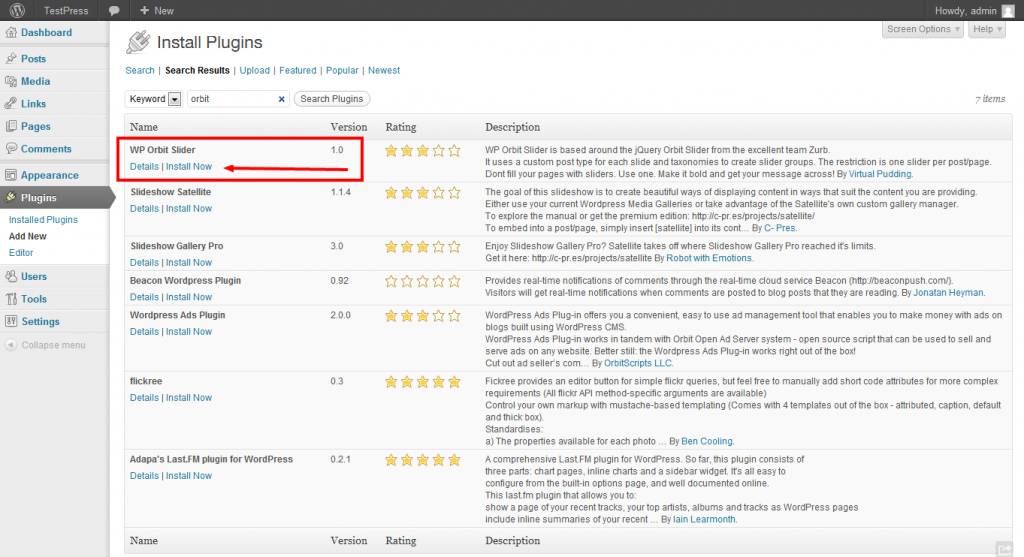
Log into the WordPress dashboard, then find the plugins page. Next, click “Add New” at the  top of the page. Search for the plugin by typing “WP Orbit Slider” into the search field.

Once the plugin has been found in the search, simply click “Install Now”. Pretty easy right? Once you have become familiar with this process, the entire WordPress Plugin Repository will become your virtual playground; experiment and have some fun!


Step 3: Setting Up The Slider

Next, we can set up the slider to display on any page that you would like but first we need to add a few slides. To begin adding slides to your new slider simply head back to your WordPress Dashboard. Now, locate the item on your navigation sidebar that says “Slides”, click and jump into the slides main page. Just as with the plugins before, we can now begin to add new slides to our slideshow. If you would like a bit more of a walkthrough, check out the video below for a step by step introduction to adding slides to our slider, declaring them as featured images and adding a descriptive title.


Step 4: Start Sliding

Finally, we can add our WP Orbit Slider to the desired page. To do this simply head over to the lucky page within your WordPress dashboard admin. Select “edit” and within the editor place the slider by typing in this shortcode

[orbit-slider]

Now, click on the Publish button and voila! Your new slideshow should be working in full force now. At any time, you may add this slider to another page. It is up to you!


I hope that you have found this tutorial to be an insightful look at how even a WordPress beginner can pull off professional level results with the help of a really neat plugin. Do you need some extra help setting up a site of your very own? Don’t hesitate to let us know via our contact page.


5 Great Premium WordPress Plugins

Posted by | News, WordPress | No Comments

WordPress is an awesome Content Management System. In fact, for most of our projects here at Untame it is our CMS of choice. However, often we require functionality that moves beyond the core WordPress offering. This is where plugins come in. The “Premium” WordPress community has grown in leaps and bounds for the last several years allowing top WP contributors to make a living developing for the platform that they are so passionate about.

This post is no kind of definitive list of the absolute best plugins on this fine planet of ours. Instead, we want to showcase five plugins we have used in the trenches of development that have made a significant difference for us.


Fancy Gallery

“Create unlimited of galleries and each gallery can hold unlimited of albums. You can add different types of media – Images, Video, Websites to the albums.”

One of the most requested features of our sites is an ability to host an image gallery on a particular site. Fancy Gallery provides for a highly customizable way to not only adjust the look of your gallery but also manage the order of the pictures within it. If your site is photo heavy (I’m looking at you wedding photographers) then fancy gallery could be a great solution for your site.


Easy Custom Content Types for WordPress

Easy Content Types provides an extremely easy-to-use and intuitive interface for creating custom post types, taxonomies, and meta boxes.

WordPress is full of incredible functionality. However, some functions are less intuitive than others, even for developers. Easy Content Types allows developers to create and manage their own post types, taxonomies and metaboxes within minutes.


Visual Form Builder Pro

“Visual Form Builder Pro is an affordable WordPress plugin that helps you build beautiful, fully functional forms in only a few minutes without writing PHP, CSS, or HTML.”

Forms stink! From coding them to working with databases to ensure that the correct information is delivered to the client on time, forms can definitely be a hassle. However, it would serve you well to take the $10 plunge into Visual Form Builder Pro. Sure, the free version that we have already covered is fantastic. But seriously, $10 is not too much to ask for such a versatile plugin that makes managing forms almost (dare I say) fun.


RoyalSlider – Touch Content Slider for WordPress

RoyalSlider for WordPress is a cross-device jQuery content slider with touch-based navigation and responsive layout. It has a user-friendly admin area where you can manage slides, change slider settings, customize your interface and add blocks-captions using custom WYSIWIG editor.

IT is one of the most popular files on CodeCanyon, and for a good reason. Image slideshows are one of the best ways to deliver a message of show off your work on a site. RoyalSlider makes integrating one or multiple slideshows a breeze. With an easy-to-use administration area, RoyalSlider can integrate into a page or post within minutes. What’s better, RoyalSlider packs in all of this power while remaining responsive. Yep, that means that RoyalSlider would look equally at home on an iPhone as on a giant desktop screen.


Visual Composer for WordPress

“Visual Composer for WordPress will save you tons of time working on the site content. Now you’ll be able to create complex layouts within minutes! It’s built on top of the Twitter Bootstrap and jQuery UI framework”

We love to set our clients up for success. Sometimes that means giving them the ability to create their own layouts without a bit of coding knowledge. Enter Visual Composer. Using Visual Composer could not be easier. Simply tell the plugin how wide your site is, set a few custom colors and you are off to the races.


We encourage you to experiment with WordPress plugins of all sorts. Plugins help make a site stand out, adding key functionality in places that WordPress just does not cover on its own. Do you have a favorite plugin that we have not covered yet? Let us know by leaving a comment or using our handy contact form.

WordPress Loop Part 2: Dig Deeper into the Loop With Template Tags

Posted by | Tutorial, WordPress | No Comments

So, you have worked your way through the first part of our series on the WordPress loop! By now, you should have a good understanding of the basic functionality it provides. Let’s dig a bit deeper and find out what we can do to make our custom loop sing.

The Basic Layout:


So, we have the basic loop in place. This loop simply opens the door to new posts using the “if have posts” expression, and closes the door using the “endwhile endif” expressions.

Handy Tags (Bookmark This One):


Template tags are what you can use to alter the way that the loop displays your content. After all, in our original loop, we only tell WordPress that we would like some ice cream (or posts) however, we have yet to say anything about the flavor. That’s where template tags come in. These tags sit within your Wordpress loop markup and serve as custom content calls for anything that WordPress is able to display.

The tags shown above are simplistic in nature, and there are many more of them to understand. However, let’s analyze the tags that we have here. Our “the_title();” tag when set between perhaps a pair of “<h2></h2>” html tags would render out an appropriately sized title for your theme.  Likewise, if you were to place the “the_content” or “excerpt” tags in an area that you had a desire to see post content or a summary respectively, they would fetch that content and place them in your loop.

Note: The majority of template tags do not work outside of the loop.

Tags in action: A Working Loop


Now that we understand how tags work, I would encourage you to start experimenting with the possible combinations. There are tags to fetch just about any post or page related data that you can think of. Let’s take a look at what a full WordPress loop looks like in action.

This loop would fit very well on a “single.php” or even an “index.php” if you wanted to show full length posts. As you can see at the beginning of this block of code, we initiate the loop. Then define an area for our post details, think of it as your meta information section for the post. Within this section we declare the post title, then follow up with a list of meta information including categories, the date on which the post was written and the author. After our meta area, we follow up by displaying our post content.  At the end of the code we clean up shop by ending our while statement, then ending our if statement to complete the loop.


I hope that this article will encourage you to dive into your theme files and play around with the loop. I promise, it is not nearly as scary as you would think. Next we will dive into grabbing posts from a specific category or author. Thank you for reading. If you would like to download our demo code file, click the button below.

Demo Files

Start planning your project today. Get Started